viernes, 8 de junio de 2018

Instalación Prestashop 1.7

Se que este tema parece un poco trivial y que hay miles de tutoriales en la red, la idea es crear una tienda en Prestashop 1.7.3.3, la versión más reciente que hay en este momento, pero con la singularidad de que tendremos las imágenes en un bucket del S3 de AWS (Amazon Web Services) de forma que no nos ocupen espacio en el hosting ya que en nuestro caso es un tanto limitado.

Comenzaremos por lo que es la instalación del Prestashop propiamente dicho para despues continuar con las distintas configuraciones, de forma que este tema comprenderá varias entradas. Pero empecemos ya...

Lo primero que tenemos que hacer, una vez adquirido el dominio y el hosting, es descargar la última versión de Prestashop y subirla al hosting para proceder a la instalación, para ello iremos a la página oficial de Prestashop y descargaremos la versión que nos interesa, en este caso la última, 1.7.3.3

https://www.prestashop.com/es/descarga


Despues de descargar, la propia página de Prestashop nos muestra un tutorial sobre como instalar Prestashop 1.7 ya que hay algunos cambios respecto a versiones anteriores, pero nosotros ya sabemos como movernos un poco en este mundillo, así que lo obviaremos, de todas formas os dejo el enlace para quien le interese.


Una vez descargado el fichero lo primero que haremos es descomprimirlo y subir los ficheros index.php y prestashop.zip a la carpeta de nuestro hosting donde vayamos a alojar la web. Debemos tener creada tambien la BD que usara Prestashop. Cuando tengamos todo esto listo ya podremos comenzar la instalación, para ello bastará con que escribamos la url de nuestro nuevo sitio y sigamos las instrucciones.

Tras una pequeña animación donde vemos como se va descomprimiendo Prestashop en nuestro hosting nos aparecera la siguiente pantalla donde pondremos seleccionar el idioma, en nuestro caso Español, lo seleccionamos y pulsamos Next


A continuación debemos leer y aceptar los términos y condiciones del acuerdo de lincencia y volveremos a pulsar en el botón siguiente


En el siguiente paso el instalador verificará que el sistema cumple con las especificaciones requeridas para el correcto funcionamiento de Prestashop, en caso de detectar algún problema o tener alguna sugerencia nos los indicará en la pantalla. Cuando este todo correcto podremos pulsar el botón siguiente para continuar.


El siguiente paso será introducir la información de la tienda, Nombre, Actividad y País, los datos del administrador de la misma y su contraseña, cuando tengamos toda la info volveremos a pulsar en siguiente.


A continuación deberemos introducir los datos de conexión con la base de datos, si usas un puesto distinto al por defecto, el 3306, recuerda ponerlo al final de la dirección del servidor separado por dos puntos de la misma (:4242).  Aquí podremos elegir el prefijo de las tablas de Prestashop que vamos a crear, por defecto es ps_ pero podemos cambiarlo a otro y dar un poco mas de seguridad a nuestra BD. Podemos comprobar que los datos que hemos introducido son correctos gracias pulsando en el botón indicado para ello, cuando todo este operativo pulsaremos en Siguiente.


La siguiente pantalla nos muestra como va el progreso de nuestra instalación de Prestashop


Una vez completado nos aparecerá la siguiente pantalla donde nos indica que todo ha terminado correctamente y nos recuerda que debemos eliminar el directorio install para evitar problemas futuros. 


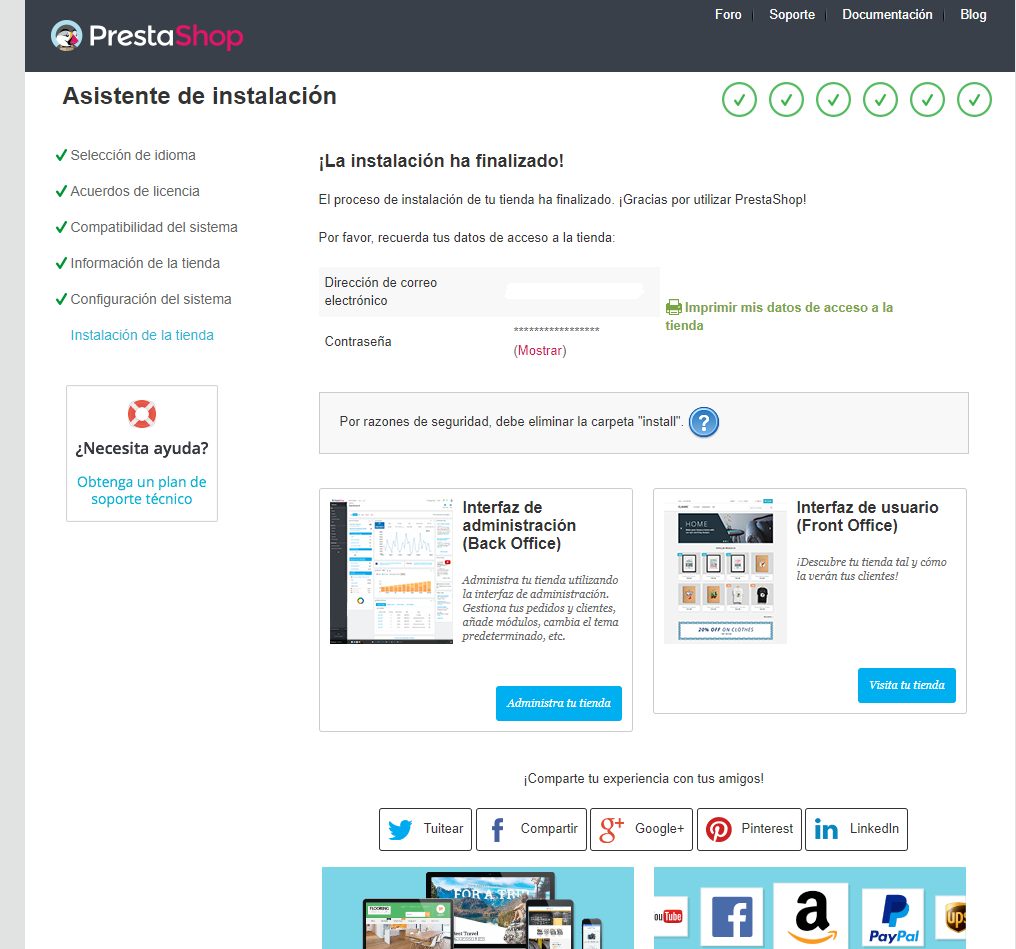
Cuando ya tengamos la carpeta eliminada podremos acceder a la administración de Prestashop, tenemos un enlace a la administración en esta última pantalla de la instalación, y comenzar a configurar nuestra tienda, pero el tema la configuración lo explicaremos en otra entrada.

miércoles, 13 de abril de 2016

Datetime vacío en VB.NET

Si habeís declarado una variable de tipo DateTime en VB.NET y quereis saber si se le ha asignado algún valor en un momento dado hay que compararla con DateTime.minValue

dim fecha as DateTime

If Me.fecha = DateTime.MinValue Then
   'no se le ha asignado valor todavia

Fecha nula en mysql

Si al hacer una consulta con un campo de tipo fecha nos encontramos que la fecha nula nos la devuelve como '00/00/0000' y queremos que nos devuelva null debemos hacer la consulta de la siguiente forma:


SELECT IF(fecha,date_format(fecha, '%d/%m/%Y'),NULL) as fecha FROM tabla

jueves, 7 de noviembre de 2013

Apertura de un cajón conectado a una impresora desde VB.NET

Para abrir un cajón conectado a traves de una impresora con VB.NET sin necesidad de tocar en la configuración de la impresora ni imprimir nada, es necesario enviar un conjunto de caracteres propios de cada impresora sin formato a la misma para que proceda a abrir el cajon, en nuestro caso tenemos una Bixolon srp-350II plus, cuyo codigo es: 27,112,0,50,250, para consultar codigos de otras impresoras: http://keyhut.com/popopen.htm

En el caso de una impresora SEYPOS PRP-085 IIIV el código que debemos usar es 27,112,0,5,5

usaremos la siguiente clase (http://support.microsoft.com/kb/322090),


Imports System.IO
Imports System.Drawing.Printing
Imports System.Runtime.InteropServices


     Private Sub Button1_Click(ByVal sender As System.Object, ByVal e 
As System.EventArgs) Handles Button1.Click
        Dim s As String
        Dim pd As New PrintDialog()

        s = Chr(27) + Chr(112) + Chr(0) + Chr(50) + Chr(250)
        
        pd.PrinterSettings = New PrinterSettings()
        Dim impresora as String = "BIXOLON" 'nombre de la impresora 
        RawPrinterHelper.SendStringToPrinter(BIXOLON, s)
        
    End Sub 


Public Class RawPrinterHelper
    ' Structure and API declarions:
    <StructLayout(LayoutKind.Sequential, CharSet:=CharSet.Unicode)> _
    Structure DOCINFOW
        <MarshalAs(UnmanagedType.LPWStr)> Public pDocName As String
        <MarshalAs(UnmanagedType.LPWStr)> Public pOutputFile As String
        <MarshalAs(UnmanagedType.LPWStr)> Public pDataType As String
    End Structure

    <DllImport("winspool.Drv", EntryPoint:="OpenPrinterW", _
       SetLastError:=True, CharSet:=CharSet.Unicode, _
       ExactSpelling:=True, CallingConvention:=CallingConvention.StdCall)> _
    Public Shared Function OpenPrinter(ByVal src As String, ByRef hPrinter 
As IntPtr, ByVal pd As Long) As Boolean
    End Function
    <DllImport("winspool.Drv", EntryPoint:="ClosePrinter", _
       SetLastError:=True, CharSet:=CharSet.Unicode, _
       ExactSpelling:=True, CallingConvention:=CallingConvention.StdCall)> _
    Public Shared Function ClosePrinter(ByVal hPrinter As IntPtr) As Boolean
    End Function
    <DllImport("winspool.Drv", EntryPoint:="StartDocPrinterW", _
       SetLastError:=True, CharSet:=CharSet.Unicode, _
       ExactSpelling:=True, CallingConvention:=CallingConvention.StdCall)> _
    Public Shared Function StartDocPrinter(ByVal hPrinter As IntPtr, ByVal level 
As Int32, ByRef pDI As DOCINFOW) As Boolean
    End Function
    <DllImport("winspool.Drv", EntryPoint:="EndDocPrinter", _
       SetLastError:=True, CharSet:=CharSet.Unicode, _
       ExactSpelling:=True, CallingConvention:=CallingConvention.StdCall)> _
    Public Shared Function EndDocPrinter(ByVal hPrinter As IntPtr) As Boolean
    End Function
    <DllImport("winspool.Drv", EntryPoint:="StartPagePrinter", _
       SetLastError:=True, CharSet:=CharSet.Unicode, _
       ExactSpelling:=True, CallingConvention:=CallingConvention.StdCall)> _
    Public Shared Function StartPagePrinter(ByVal hPrinter As IntPtr) As Boolean
    End Function
    <DllImport("winspool.Drv", EntryPoint:="EndPagePrinter", _
       SetLastError:=True, CharSet:=CharSet.Unicode, _
       ExactSpelling:=True, CallingConvention:=CallingConvention.StdCall)> _
    Public Shared Function EndPagePrinter(ByVal hPrinter As IntPtr) As Boolean
    End Function
    <DllImport("winspool.Drv", EntryPoint:="WritePrinter", _
       SetLastError:=True, CharSet:=CharSet.Unicode, _
       ExactSpelling:=True, CallingConvention:=CallingConvention.StdCall)> _
    Public Shared Function WritePrinter(ByVal hPrinter As IntPtr, ByVal pBytes 
As IntPtr, ByVal dwCount As Int32, ByRef dwWritten As Int32) As Boolean
    End Function

    ' SendBytesToPrinter()
    ' When the function is given a printer name and an unmanaged array of  
    ' bytes, the function sends those bytes to the print queue.
    ' Returns True on success or False on failure.
    Public Shared Function SendBytesToPrinter(ByVal szPrinterName As String, 
ByVal pBytes As IntPtr, ByVal dwCount As Int32) As Boolean
        Dim hPrinter As IntPtr   ' The printer handle.
        Dim dwError As Int32     ' Last error - in case there was trouble.
        Dim di As DOCINFOW       ' Describes your document (name, port,data type).
        Dim dwWritten As Int32   ' The number of bytes written by WritePrinter().
        Dim bSuccess As Boolean  ' Your success code.

        ' Set up the DOCINFO structure.
        With di
            .pDocName = "My Visual Basic .NET RAW Document"
            .pDataType = "RAW"
        End With
        ' Assume failure unless you specifically succeed.
        bSuccess = False
        If OpenPrinter(szPrinterName, hPrinter, 0) Then
            If StartDocPrinter(hPrinter, 1, di) Then
                If StartPagePrinter(hPrinter) Then
                    ' Write your printer-specific bytes to the printer.
                    bSuccess = WritePrinter(hPrinter, pBytes, dwCount, dwWritten)
                    EndPagePrinter(hPrinter)
                End If
                EndDocPrinter(hPrinter)
            End If
            ClosePrinter(hPrinter)
        End If
        ' If you did not succeed, GetLastError may give more information
        ' about why not.
        If bSuccess = False Then
            dwError = Marshal.GetLastWin32Error()
        End If
        Return bSuccess
    End Function ' SendBytesToPrinter()

    ' SendFileToPrinter()
    ' When the function is given a file name and a printer name, 
    ' the function reads the contents of the file and sends the
    ' contents to the printer.
    ' Presumes that the file contains printer-ready data.
    ' Shows how to use the SendBytesToPrinter function.
    ' Returns True on success or False on failure.
    Public Shared Function SendFileToPrinter(ByVal szPrinterName As String, 
ByVal szFileName As String) As Boolean
        ' Open the file.
        Dim fs As New FileStream(szFileName, FileMode.Open)
        ' Create a BinaryReader on the file.
        Dim br As New BinaryReader(fs)
        ' Dim an array of bytes large enough to hold the file's contents.
        Dim bytes(fs.Length) As Byte
        Dim bSuccess As Boolean
        ' Your unmanaged pointer.
        Dim pUnmanagedBytes As IntPtr

        ' Read the contents of the file into the array.
        bytes = br.ReadBytes(fs.Length)
        ' Allocate some unmanaged memory for those bytes.
        pUnmanagedBytes = Marshal.AllocCoTaskMem(fs.Length)
        ' Copy the managed byte array into the unmanaged array.
        Marshal.Copy(bytes, 0, pUnmanagedBytes, fs.Length)
        ' Send the unmanaged bytes to the printer.
        bSuccess = SendBytesToPrinter(szPrinterName, pUnmanagedBytes, fs.Length)
        ' Free the unmanaged memory that you allocated earlier.
        Marshal.FreeCoTaskMem(pUnmanagedBytes)
        Return bSuccess
    End Function ' SendFileToPrinter()

    ' When the function is given a string and a printer name,
    ' the function sends the string to the printer as raw bytes.
    Public Shared Function SendStringToPrinter(ByVal szPrinterName As String, 
ByVal szString As String)
        Dim pBytes As IntPtr
        Dim dwCount As Int32
        ' How many characters are in the string?
        dwCount = szString.Length()
        ' Assume that the printer is expecting ANSI text, and then convert
        ' the string to ANSI text.
        pBytes = Marshal.StringToCoTaskMemAnsi(szString)
        ' Send the converted ANSI string to the printer.
        SendBytesToPrinter(szPrinterName, pBytes, dwCount)
        Marshal.FreeCoTaskMem(pBytes)
    End Function
End Class